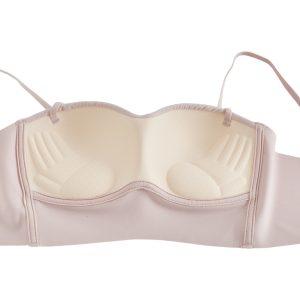
Why the First Bra Sample Is Rarely Perfect — And What Brands Should Check Instead
When a brand receives its first custom bra sample, there is often one immediate question:
“Is this sample correct?”
That sounds reasonable.
But in bra development, the first sample usually has a different purpose.
It is not simply a miniature version of the final production order.
It is the first physical test of several decisions that previously existed only as drawings, measurements, fabrics, components and construction instructions.
For that reason, a first sample may reveal issues with fit, proportion, fabric behavior or construction.
That does not necessarily mean the development has failed.
In many cases, finding those issues is exactly what the first sample is supposed to do.
The more useful question is:
What should a brand evaluate before requesting the next bra sample?
A Tech Pack Cannot Predict Everything
A detailed Tech Pack is extremely valuable.
It can specify:
- measurements;
- cup construction;
- strap width;
- hook-and-eye size;
- elastic width;
- fabric;
- trims;
- stitching;
- color;
- artwork;
- labeling.
But a Tech Pack still describes a three-dimensional garment using measurements and technical instructions.
Once those instructions become a physical bra, different elements begin interacting with each other.
For example, changing the stretch of the wing fabric may affect band tension.
Changing the cup fabric may affect cup shape.
Changing the elastic may affect how the neckline sits against the body.
This is why physical sampling remains an important part of custom bra development.
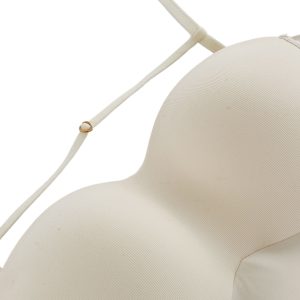
1. Start With the Overall Silhouette
Before measuring every small detail, look at the bra as a complete product.
Ask:
- Does it look like the product you intended to create?
- Is the coverage approximately right?
- Is the neckline too high or too low?
- Does the cup appear too shallow or too projected?
- Is the center front proportion correct?
- Does the bra create the intended breast shape?
This first evaluation is important because a technically accurate measurement does not always guarantee the intended visual result.
For example, the cup height might match the specification, but the finished neckline may still look different because of fabric stretch or cup construction.
Evaluate the product first, then investigate the individual measurements responsible for the result.
2. Check the Band Before Blaming the Cup
When a bra feels wrong, customers often focus immediately on the cup.
But the band should also be checked carefully.
The band provides an important part of the bra’s support and positioning.
Check whether it:
- feels too tight;
- feels too loose;
- rides upward at the back;
- twists during wear;
- stretches more than expected;
- creates excessive pressure.
The same band measurement can also behave differently when the material changes.
A softer, more elastic wing fabric may feel different from a firmer power mesh even if both pieces are cut to similar dimensions.
So sample comments such as:
“Please make the band more comfortable.”
are less useful than:
“The back band feels approximately 2–3 cm too tight when worn. Please review the wing fabric stretch and finished band tension.”
Specific feedback gives the development team something they can actually investigate.
3. Then Evaluate Cup Volume
Now look at how the breast sits inside the cup.
Common signs that require attention include:
Cup Overflow
Breast tissue spills over the neckline or side of the cup.
Possible factors may include:
- insufficient cup volume;
- unsuitable cup shape;
- neckline tension;
- padding volume;
- cup positioning.
Cup Gaping
There is visible space between the cup and the body.
Possible factors may include:
- excessive volume;
- cup shape mismatch;
- neckline length;
- cup edge tension;
- molded cup shape.
The important point is that gaping does not automatically mean “make the cup smaller.”
Likewise, overflow does not automatically mean every part of the cup needs to become larger.
The location of the problem matters.
4. Look at Where the Cup Problem Happens
Consider two samples.
Both appear slightly loose.
But Sample A gaps at the upper cup.
Sample B has excess volume near the apex.
Those are not necessarily the same fit problem.
This is why useful sample feedback should describe where the issue occurs.
Instead of:
“Cup too big.”
Try:
“There is approximately 8–10 mm of gaping along the upper cup edge near the strap attachment.”
That gives the pattern maker much more useful information.
5. Check the Center Front
For underwired bras, the center front—or gore—deserves its own evaluation.
Check:
- width;
- height;
- position;
- whether it sits as intended;
- whether the wire shape feels appropriate.
A small visual change at the center front can significantly alter the appearance of the bra.
For plunge styles, this area becomes especially important because the design may require a lower center front while still maintaining the intended cup positioning.
6. Check the Underwire Separately
Do not evaluate the underwire only by asking whether it feels comfortable.
Look at where it actually sits.
Questions include:
- Is the wire too narrow?
- Is it too wide?
- Does it follow the intended breast root?
- Is the outer wire position correct?
- Does the center wire position feel appropriate?
- Is the wire length compatible with the cup and channel?
If the wire is incorrect, changing only the cup fabric may not solve the underlying fit issue.
7. Check Strap Position — Not Just Strap Length
Straps are adjustable, so it is easy to assume that any strap problem can be solved by making them longer or shorter.
But strap position also matters.
Check the front attachment point.
Is it too close to the neck?
Too far toward the shoulder?
Check the back attachment as well.
Strap placement can influence:
- comfort;
- neckline appearance;
- support;
- shoulder pressure;
- strap slippage.
If the strap repeatedly falls from the shoulder, simply tightening it may not address the real problem.
8. Check Elastic Tension
This is one of the details that can make a sample look noticeably different even when the basic pattern is close.
Look at:
- underband elastic;
- neckline elastic;
- underarm elastic;
- wing elastic.
Too much tension may create:
- digging;
- puckering;
- distortion.
Too little tension may create:
- gaping;
- loose edges;
- insufficient recovery.
Brands should therefore avoid evaluating fabric, pattern and elastic as completely separate elements.
They work together.
9. Wear the Sample — Don’t Only Photograph It
A bra can look acceptable in a static front-view photograph and still perform poorly during normal movement.
If possible, evaluate the sample while:
- standing;
- sitting;
- raising the arms;
- bending;
- walking.
Observe whether:
- the band moves;
- the cup shifts;
- straps slip;
- the wire changes position;
- the neckline gaps.
For an everyday bra, this type of wear evaluation can be more informative than a single studio photograph.
10. Separate Fit Problems From Design Preferences
This is an important distinction during OEM development.
Consider these two comments:
“The cup is gaping near the neckline.”
and
“We want the neckline 15 mm lower because we prefer a more open look.”
The first is primarily a fit observation.
The second is a design change.
Both are valid.
But they should not be mixed together.
If the customer changes the design significantly while the factory is also correcting fit, it can become difficult to understand which modification caused the result in the next sample.
Don’t Change Five Major Things at Once
Suppose Sample 1 arrives and the brand requests:
- different fabric;
- different cup;
- different wire;
- lower neckline;
- tighter band;
- new elastic.
Sample 2 may look completely different.
But if the fit improves—or becomes worse—it can be difficult to identify why.
When possible, sample development should be controlled.
Prioritize the most important issues first.
This makes each sample round more informative.
Use a Sample Comment Sheet
One of the simplest ways to make OEM development more efficient is to organize feedback instead of sending scattered WhatsApp messages.
A basic sample comment sheet can contain:
| Area | Current Issue | Requested Change | Priority |
|---|---|---|---|
| Upper Cup | Slight gaping | Reduce upper edge | High |
| Band | Feels tight | Review tension | High |
| Strap | Position too wide | Move inward | Medium |
| Bow | Too large | Reduce size | Low |
Photos can then be numbered to match each comment.
For example:
Comment 01 — Upper Cup
Attach a close-up image with an arrow showing exactly where the gaping occurs.
This is much clearer than:
“Please improve the cup.”
Measure the Physical Sample Too
When reviewing a sample, compare important finished measurements against the specification.
Depending on the design, these may include:
- underbust/band length;
- cup height;
- cup width;
- center-front height;
- wing height;
- strap width;
- strap position;
- hook-and-eye width.
However, measurements should be considered together with fit.
A measurement can match the Tech Pack while the product still requires adjustment because the material behaves differently than expected.
What Should Be Fixed First?
If a sample has many comments, prioritize them.
A useful order is often:
1. Fundamental fit
Cup volume, band fit, wire position.
2. Product proportion
Coverage, neckline, center front, wing height.
3. Functional details
Straps, elastic tension, closures.
4. Cosmetic details
Bows, decorative trims, minor stitching appearance.
There is little value in spending excessive time adjusting a decorative bow while the cup shape is still being changed.
How Many Bra Samples Are Needed?
There is no universal number.
A relatively simple style based on an established construction may develop quickly.
A new design involving:
- custom fit;
- new fabrics;
- unusual cup construction;
- custom padding;
- new size range;
- special trims
may require additional development rounds.
The objective should not be:
“We must approve Sample 1.”
The objective should be:
“We need a production-ready specification that consistently produces the intended product.”
Those are very different goals.
What Makes Sample Development Faster?
Factories can usually work more efficiently when the customer provides clear information.
Before development, prepare as much as possible:
- Tech Pack;
- measurement chart;
- size range;
- material requirements;
- color references;
- logo files;
- label requirements;
- reference samples;
- construction references.
After receiving the sample, consolidate comments into one clear revision document whenever possible.
Avoid sending one change today, another tomorrow and another three days later.
A consolidated revision list reduces confusion.
The First Sample Is a Development Tool
For a custom bra project, the first sample should answer questions.
Does the construction work?
Does the material behave as expected?
Is the silhouette correct?
Does the fit direction make sense?
Which areas need adjustment before the next stage?
Viewed this way, Sample 1 is not simply a pass-or-fail test.
It is an important source of information.
And the quality of the customer’s feedback can influence the efficiency of the next development round.
Developing a Custom Bra With BrasFactory
At BrasFactory, our factory in Puning, Guangdong, China works with overseas brands on OEM and private label bra development.
Customers can provide original designs, Tech Packs, reference samples and material requirements for sample evaluation and development.
For original customer designs, confidential product information can also be handled under an NDA when required.
BrasFactory
Puning, Guangdong, China
Website: https://www.brasfactory.com/
Email: Climo@brasfactory.com
WhatsApp / WeChat: +86 131 4874 7185
FAQ
Is it normal for the first bra sample to need revisions?
Yes. A first sample is commonly used to evaluate how the intended design, measurements, materials and construction work together physically.
What should I check first on a bra sample?
Start with overall silhouette and fundamental fit, including the band, cup volume and wire position, before focusing on minor decorative details.
How should I send bra sample comments to a manufacturer?
A consolidated comment sheet with numbered photos, specific problem locations and requested changes is usually clearer than scattered messages.
Should I change the fabric during sample revision?
You can, but remember that changing fabric can also change fit and behavior. If several major variables are changed simultaneously, it may become harder to determine what caused the result.
Can I send a reference bra for OEM development?
A physical reference sample can provide useful information about fit, construction and proportions, particularly when combined with a Tech Pack explaining what should be retained or changed.